
Where to Install Your ezehay Feeder
Choose carefully where to mount your feeder. If you already use a hanging haynet, the most obvious location may be on the wall behind the net.
Take into account where your horse normally stands to feed, and ensure there are no opening doors, moving objects, or hanging items that could obstruct the area or disturb the horse while feeding
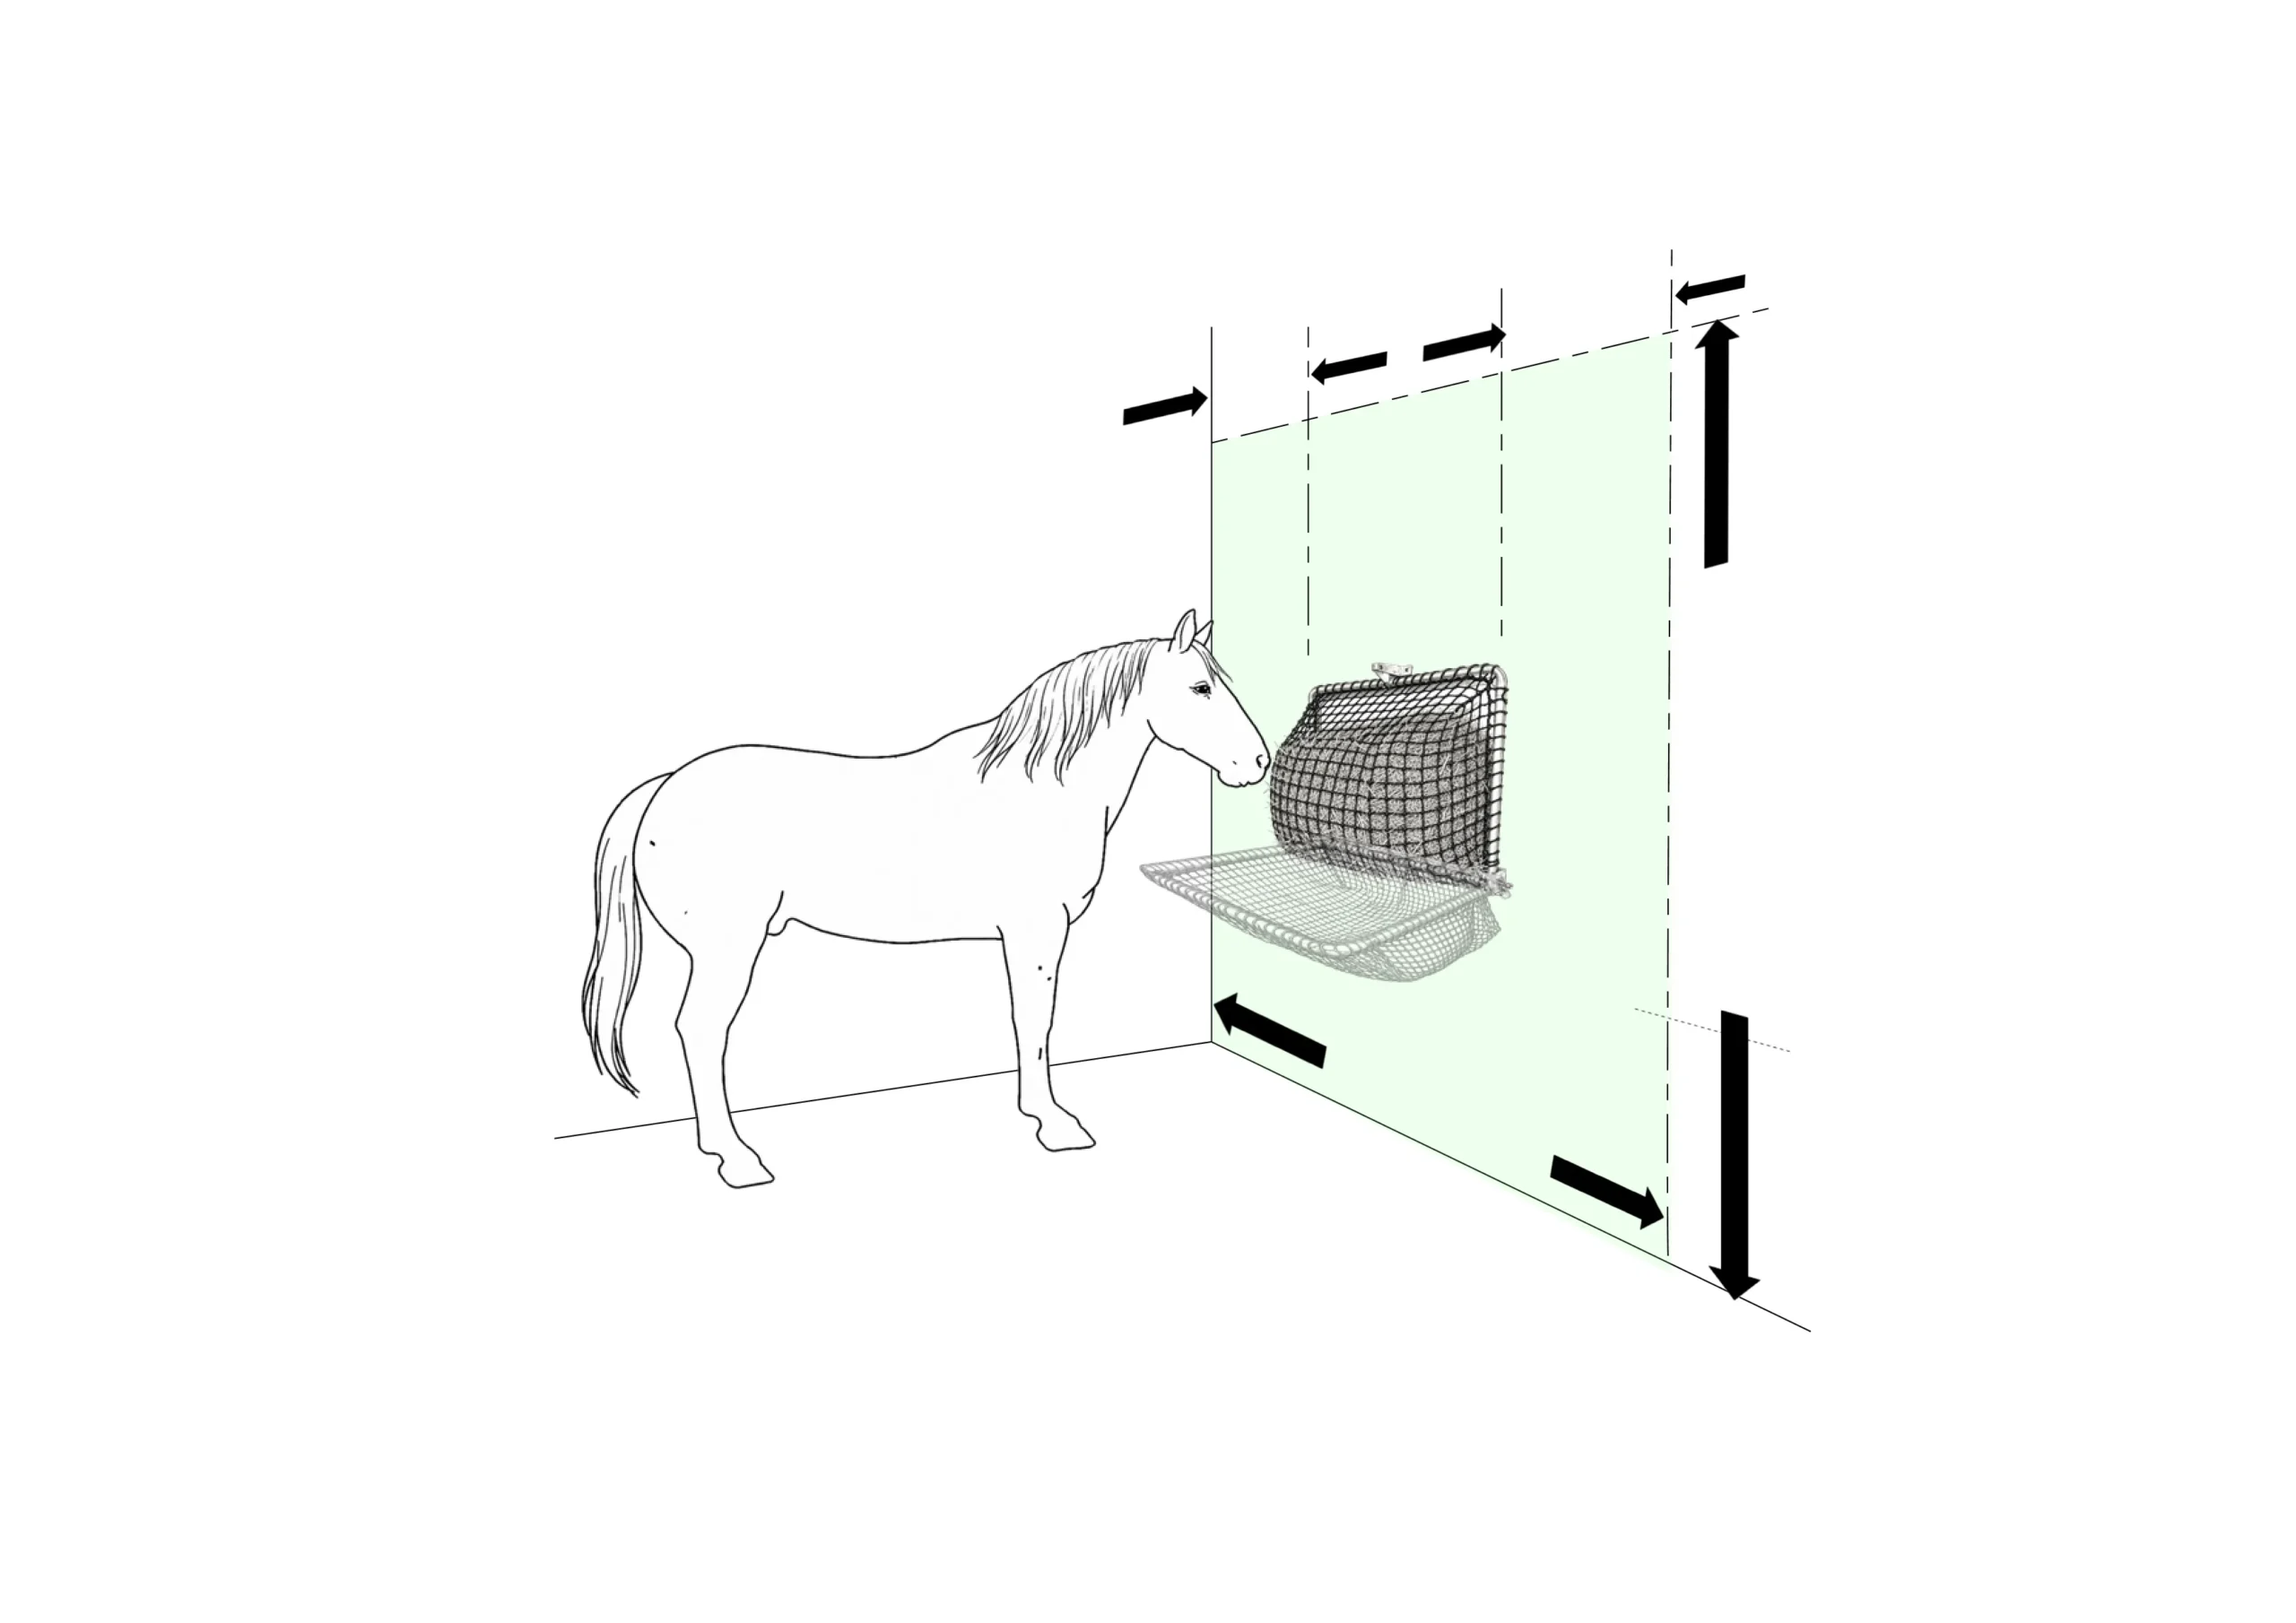
Try to find a section of wall that is relatively flat. You will need an area approximately 1 m² and about 1 m (39 in) above the ground. The wall should be structurally sound and capable of supporting secure fixings. Brick or blockwork is ideal.
Ensure there is sufficient space to withdraw the hinge bar sideways. You will need to remove the bar when fitting or changing the net. The hinge bar is reversible and can be removed from either the left- or right-hand side
Uneven or Flexible Walls
If your stable wall is uneven or constructed from wood, we recommend fixing a plywood backing board to the wall before mounting your ezehay feeder.
The plywood should be
- Exterior grade
- A minimum thickness of 15 mm
- Approximately 1 m × 1 m in size
When securely screwed or bolted to the wall, the plywood will provide a solid, flat surface for mounting your ezehay feeder.
Warning
Strong fixings are essential, an energetic horse can exert considerable force on the feeder.
It is important that the ezehay hoop and catch are fixed securely to the wall.
If you are at all uncertain about the installation, please seek assistance from a suitably qualified person
Mounting Your ezehay Feeder
Preparation
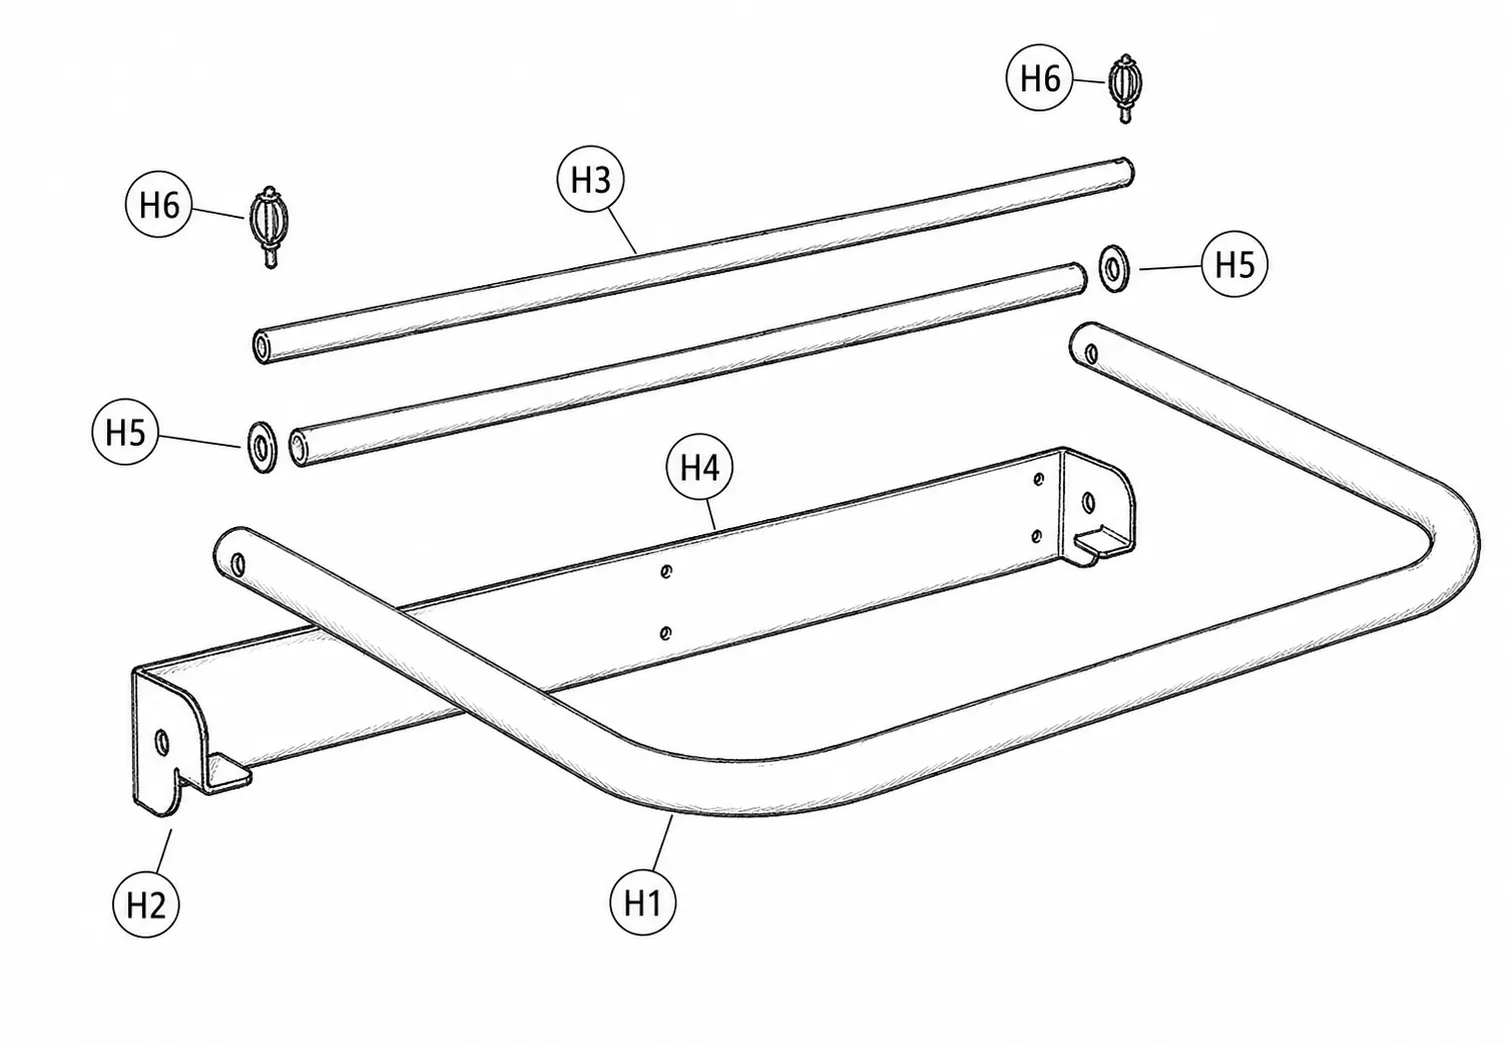
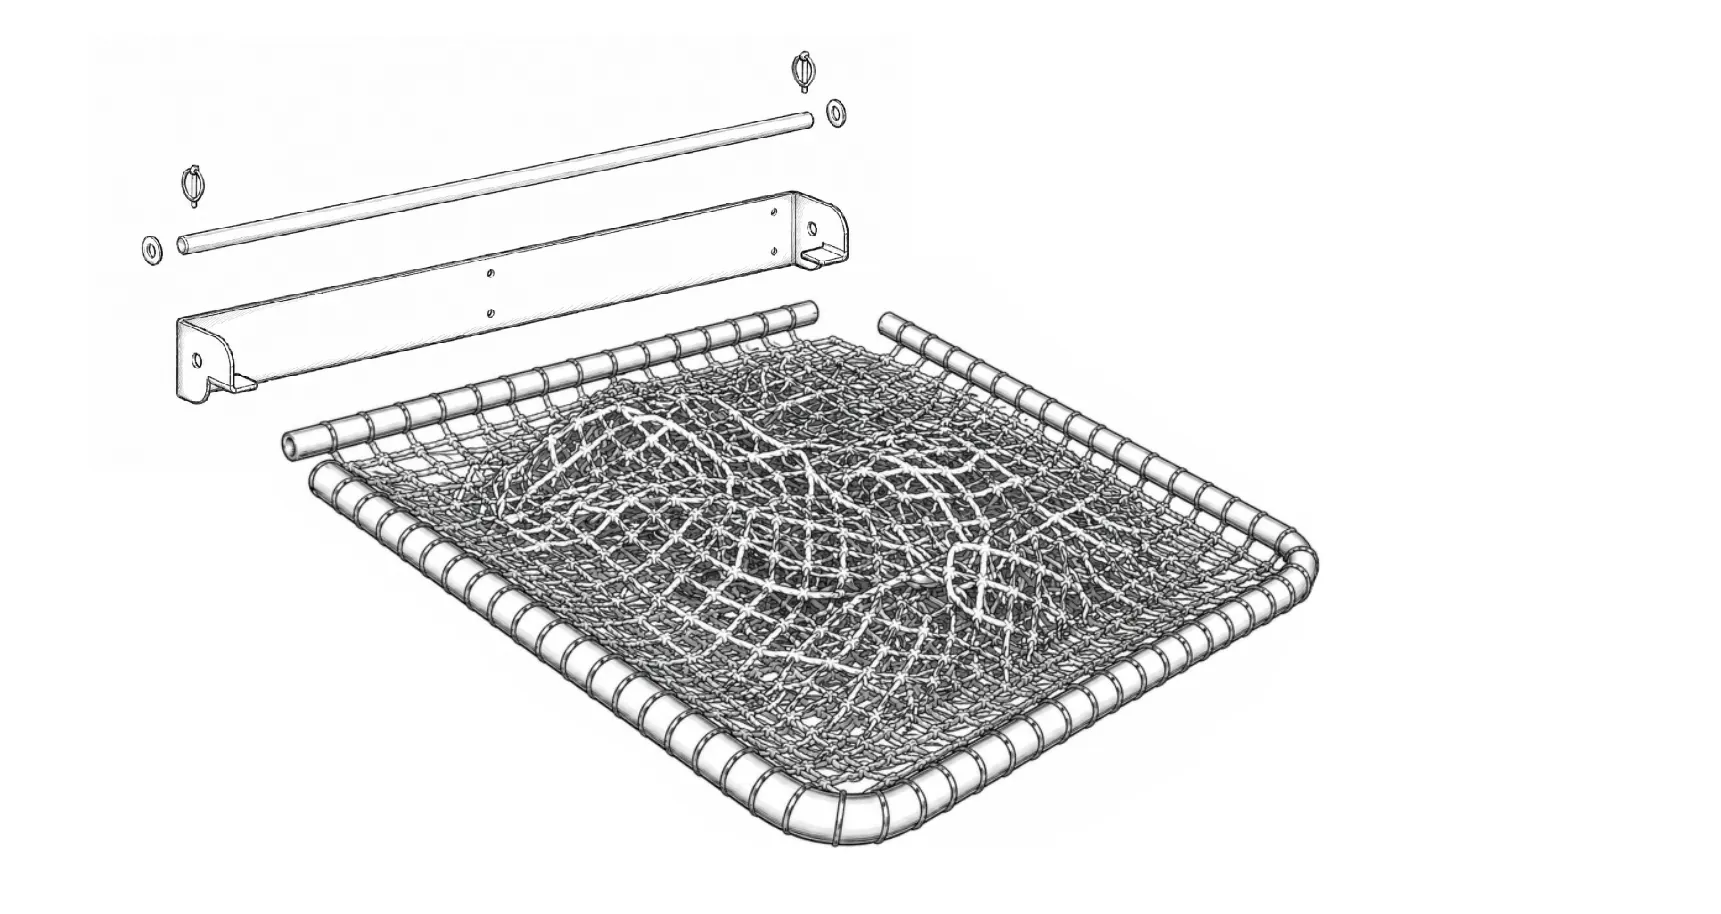
Your ezehay feeder is usually supplied fully assembled. However, we recommend separating the hoop and net assembly from the hingel plate before installation, as this makes fixing the hinge plate to the wall much easier.
- Place the ezehay on a flat surface. (fig B.)
- Unclip the lynch pin from one end of the hinge bar and withdraw the bar completely.
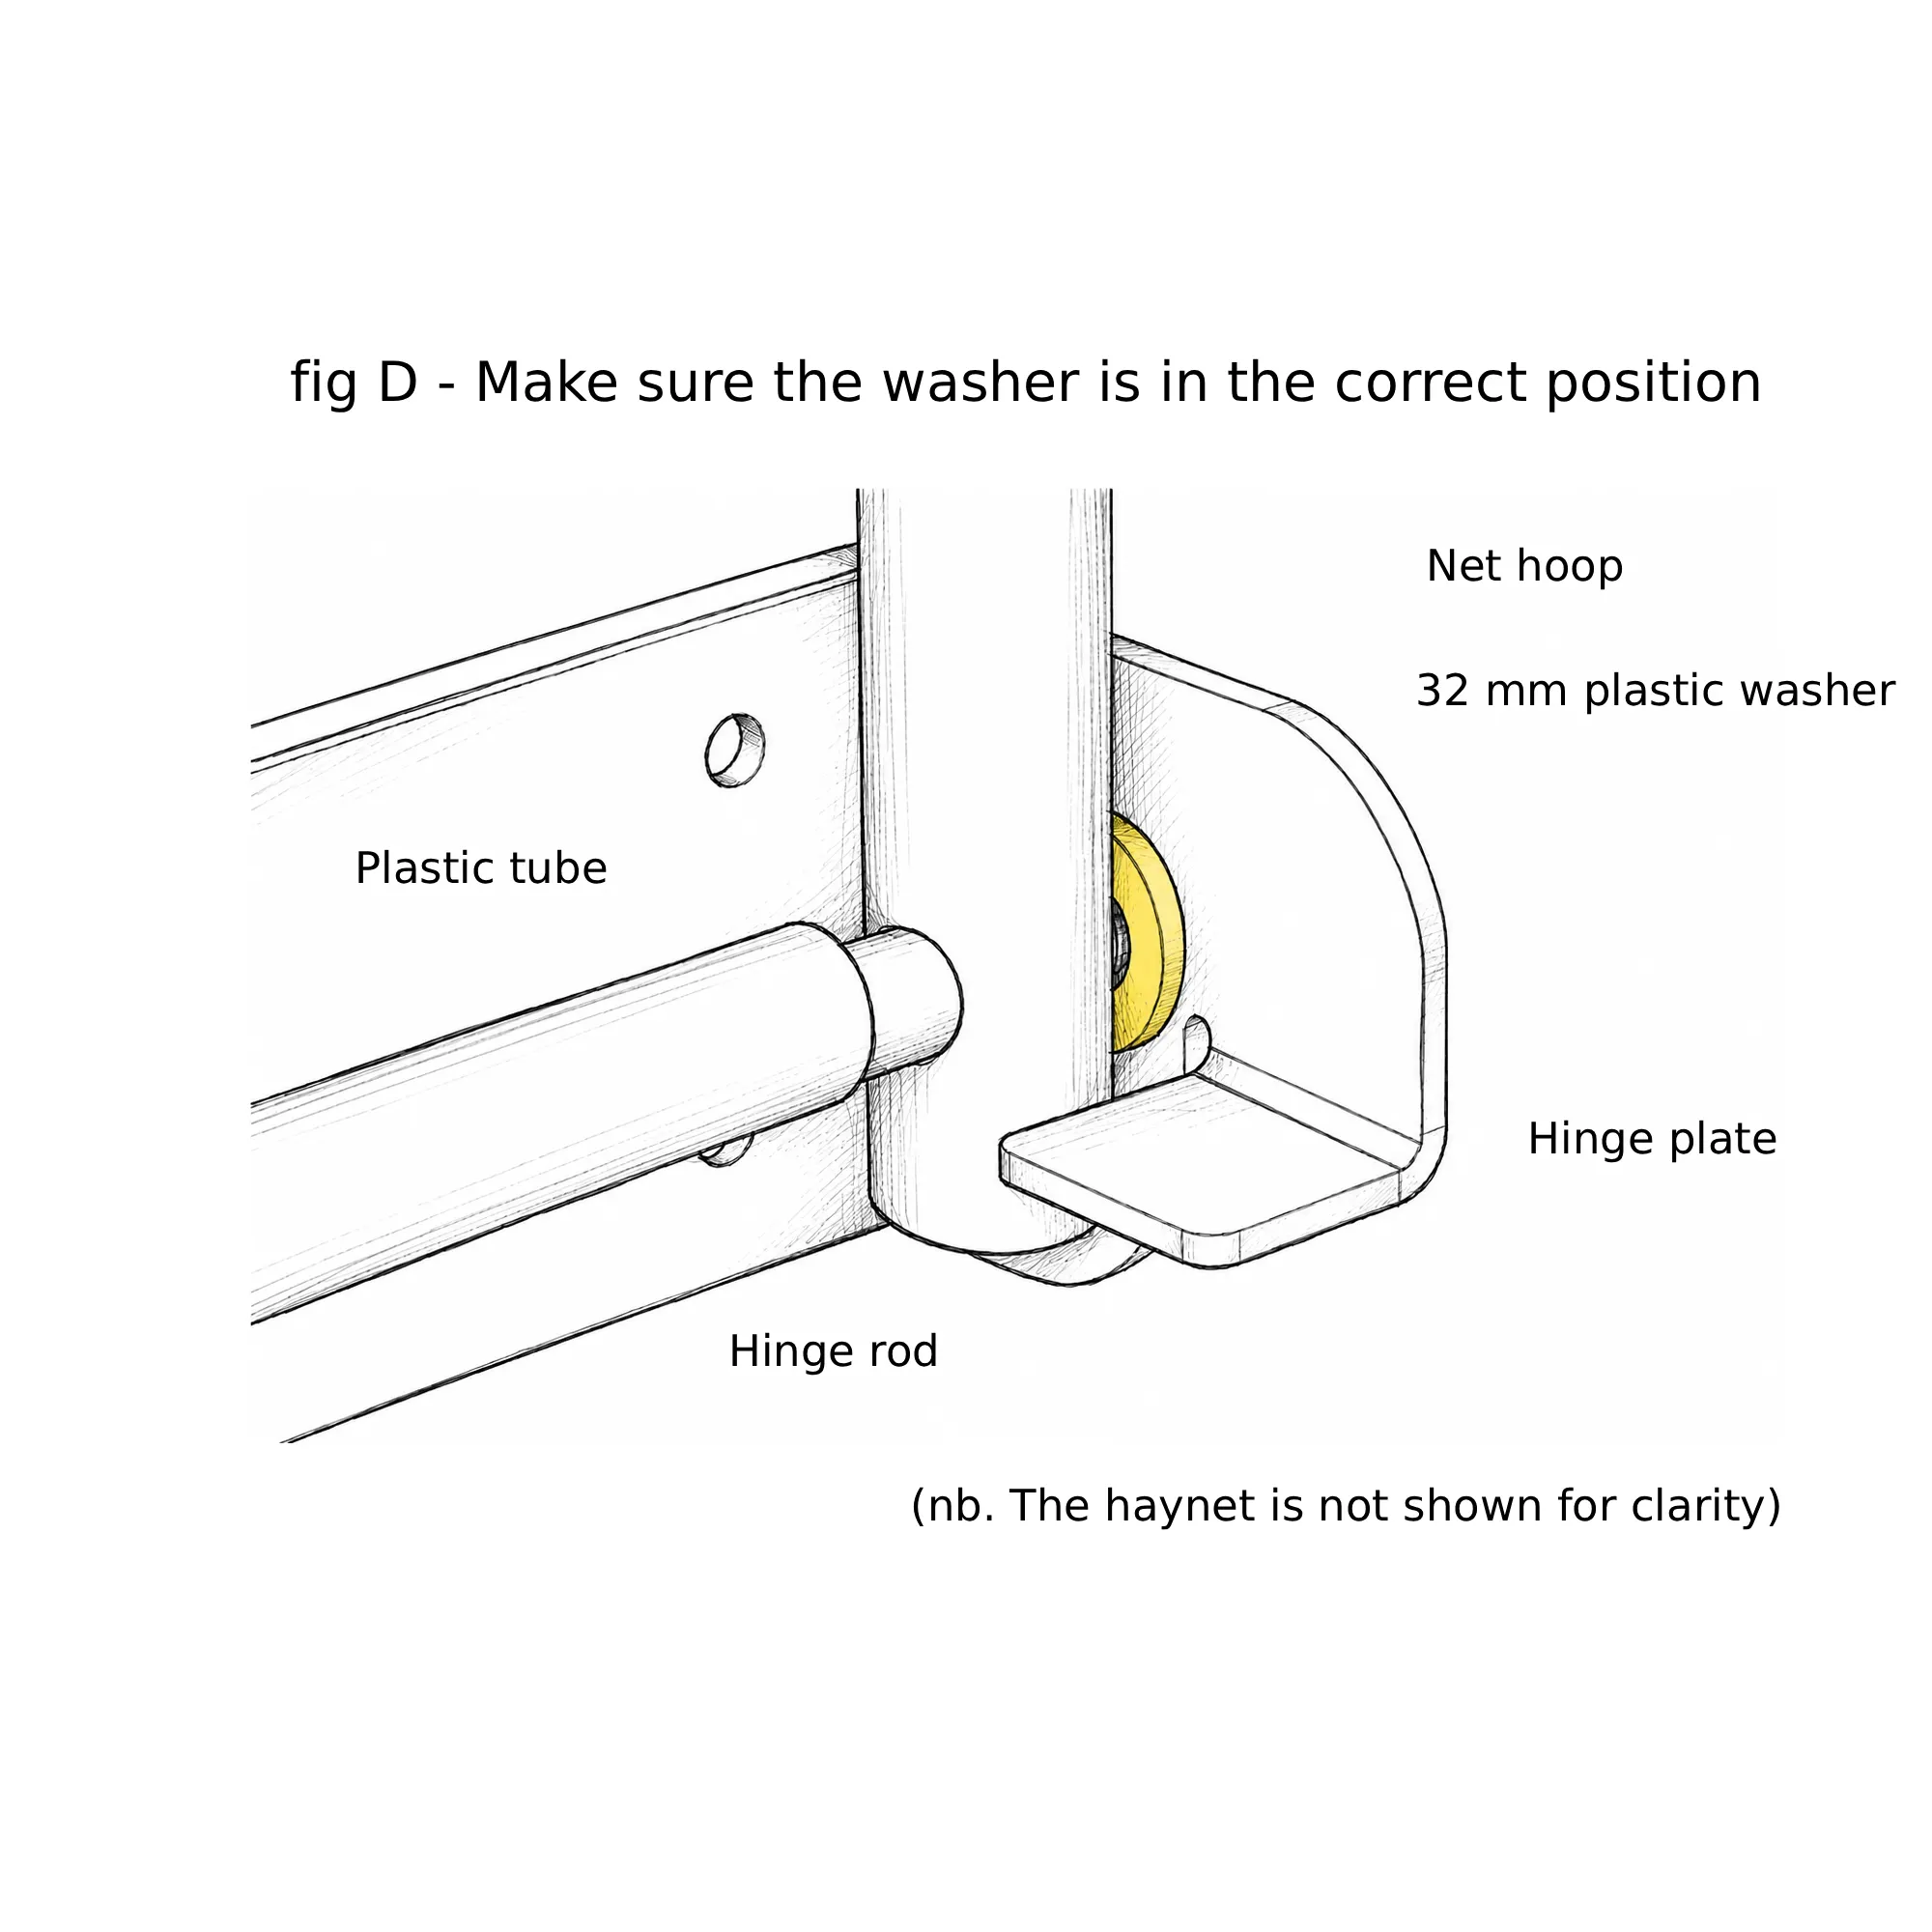
- Take care to leave the plastic tube inside the net and set the plastic washers aside.
- The hoop and net assembly will now separate from the hinge plate.
Fixing the Hinge Plate to the Wall
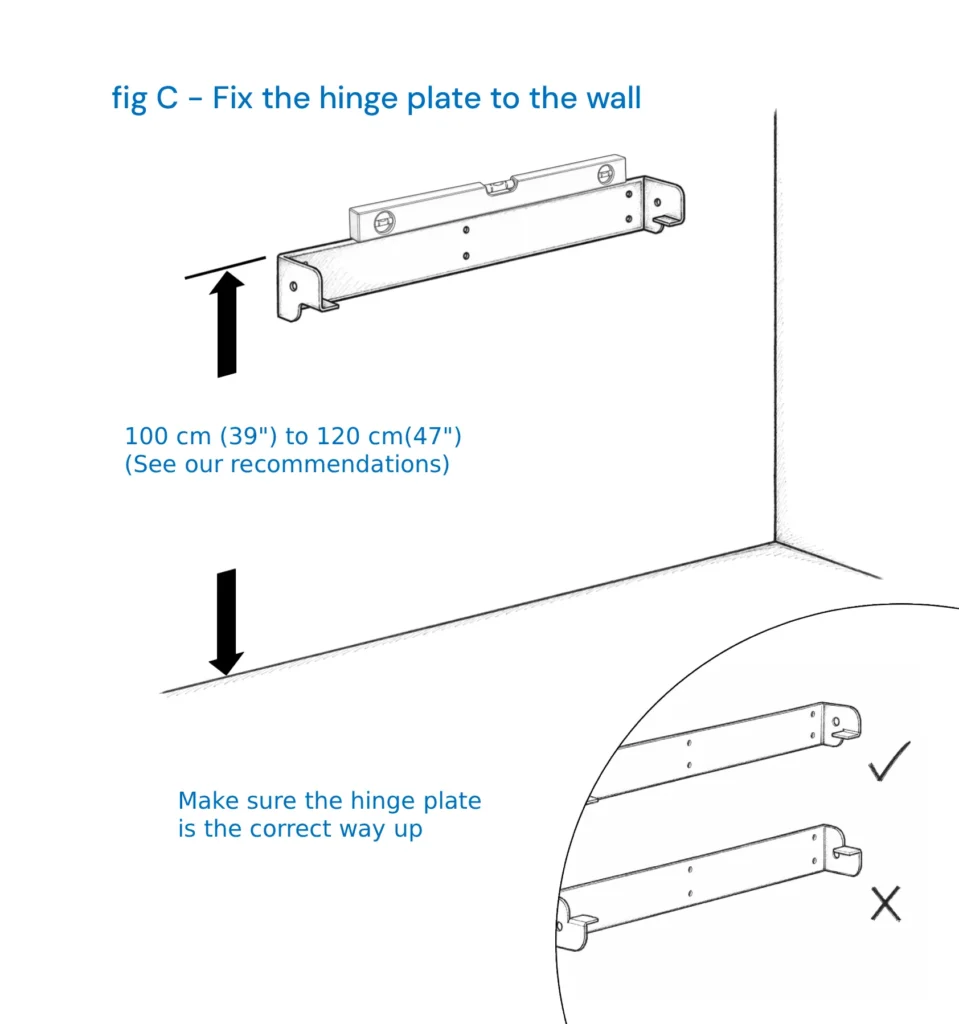
- Mark the wall at 1 m (39 in) above floor level. (fig C.)
The recommended mounting height of 1 m is based on a 16 hh horse and can be adjusted to suit individual requirements
- Drill and loosely fix the hinge plate to the wall using one of the centre fixing holes.
- Using a spirit level, level the hinge plate and mark the positions of the remaining fixing holes.
- Drill the remaining holes and securely fix the plate to the wall.
- Ensure the hinge plate is the correct way up before final tightening.
Use fixings that are suitable for your wall type. For many brick or blockwork installations, a large screw or coach bolt 4–6 mm in diameter and at least 50 mm long will be suitable.
Lorem ipsum dolor sit amet, consectetur adipiscing elit. Ut elit tellus, luctus nec ullamcorper mattis, pulvinar dapibus leo.
Lorem ipsum dolor sit amet, consectetur adipiscing elit. Ut elit tellus, luctus nec ullamcorper mattis, pulvinar dapibus leo.
Lorem ipsum dolor sit amet, consectetur adipiscing elit. Ut elit tellus, luctus nec ullamcorper mattis, pulvinar dapibus leo.
Lorem ipsum dolor sit amet, consectetur adipiscing elit. Ut elit tellus, luctus nec ullamcorper mattis, pulvinar dapibus leo.
Lorem ipsum dolor sit amet, consectetur adipiscing elit. Ut elit tellus, luctus nec ullamcorper mattis, pulvinar dapibus leo.
Lorem ipsum dolor sit amet, consectetur adipiscing elit. Ut elit tellus, luctus nec ullamcorper mattis, pulvinar dapibus leo.